Pre-Installation Safety and Workspace Setup
1. Safety Equipment Checklist
Safety before installing a laser engraver really matters for anyone setting up this kind of workspace. Make sure everyone has basic protective stuff handy like thick gloves, eye protection glasses, and maybe even ear defenders if the machine gets loud. Training people properly on how to handle emergencies and operate safely cuts down accidents a lot. Don't forget to keep a decent first aid box nearby just in case something goes wrong during setup or operation. Taking these steps upfront shows smart planning rather than waiting until there's a problem to react.
2. Workspace Requirements for Laser Chiller Installation
Getting everything right when setting up a laser chiller means thinking through where it goes and what surrounds it. The chiller needs enough room around it so air can circulate properly without getting too hot or causing any safety issues. A clean work area without stuff piled everywhere makes all the difference for running things safely day after day. We recommend finding a spot shielded from direct sun exposure and extreme temperatures since this helps keep the machine running smoothly without unexpected problems. Following these basic guidelines ensures we meet all necessary space requirements while making sure our chillers operate efficiently from day one.
3. Electrical and Ventilation Preparations
Getting the electrical work and ventilation right is absolutely critical when setting up a laser chiller system. When installing, it's important to follow all the electrical specs provided by the manufacturer for the engraving laser machine's cooling system. Most guidelines recommend running a dedicated circuit for this equipment, which helps prevent power fluctuations that could damage sensitive components. Good airflow around the unit matters too since these machines generate quite a bit of heat while running. Make sure there's enough space between walls and equipment, and keep access points clear so technicians can easily check things during routine maintenance. Taking time to get these basics correct from the start pays off in the long run with fewer breakdowns and safer operations down the line.
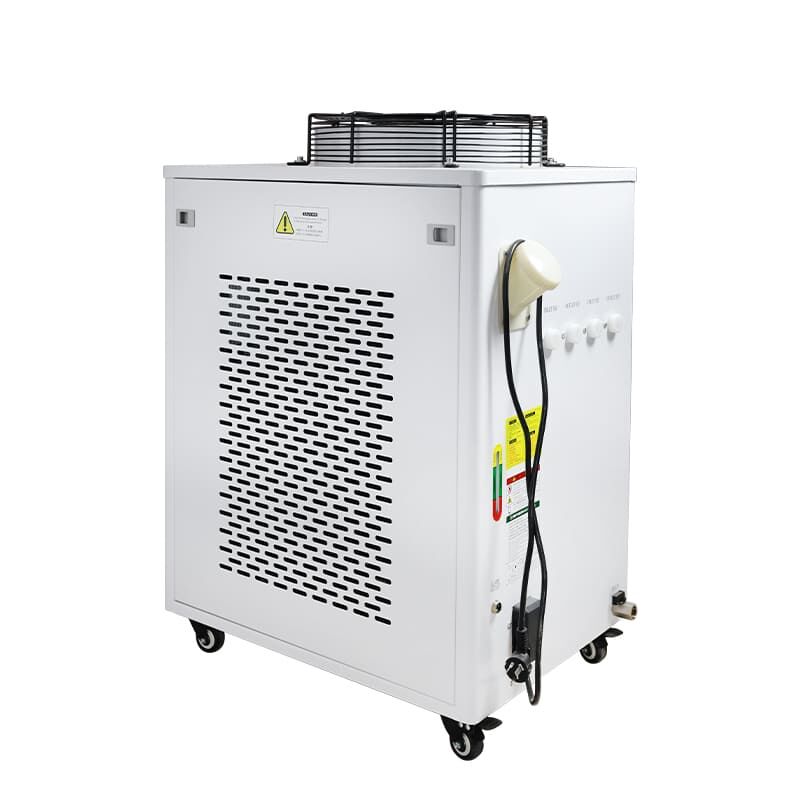
Assembling the Engraving Laser Machine Chiller
1. Unboxing and Component Inspection
When taking out an engraving laser machine chiller from its box, careful handling matters a lot because parts can get damaged if not treated properly. Start by getting rid of all the packaging stuff first, then look around for any cracks or dents on what's inside. After everything comes out, make a quick list of what's there since knowing what we have makes putting things together much easier down the road. Most boxes should contain the main chiller body, some hoses, various screws, and naturally, the instruction booklet. Cross checking these items against the packing slip is really important too. Missing something now means trouble later when trying to assemble everything. Taking this time upfront saves headaches later on and keeps the whole system running smoothly once it's finally set up.
2. Mounting the Chiller Unit Securely
Mounting a chiller unit properly is essential for keeping it running smoothly without unwanted vibrations. First things first, find a solid base for installation. Most manufacturers recommend concrete floors or heavy duty platforms. Secure the unit using those included screws or bolts they provided in the package. A wobbly installation leads to all sorts of problems down the road. The vibrations from poor mounting don't just slow down performance over time, they actually wear out parts faster than normal. When working with tricky surfaces like metal decks or poured concrete, getting hold of some specialized mounting brackets really helps stabilize things. These little extras might seem unnecessary at first glance, but trust me when I say they make a world of difference in how long the system lasts before needing repairs.
3. Connecting Water Hoses and Circulation Systems
Getting those water hoses connected properly to the circulation system takes some attention to detail if we want our chillers running at their best. Start by figuring out which hoses belong where for intake and outflow these usually come with the unit already. Making sure all connections are tight is really important because even small leaks can cause big headaches down the road, messing up performance or damaging equipment over time. Follow along with a simple process: attach each hose first to its matching port on the chiller itself, then run them over to connect with the laser system components. When everything's hooked up right, cold water flows through continuously, keeping the laser operating within safe temperature ranges throughout regular use. No more worrying about unexpected overheating issues interrupting work sessions or causing component failures.
Integrating the Chiller with Your Laser System
1. Attaching Water Inlet/Outlet to the Laser Tube
Connecting the water inlet and outlet of the chiller properly to the laser engraver tube makes all the difference when it comes to keeping things cool enough. Start by figuring out where exactly those inlet and outlet ports are located on both the chiller unit itself and the actual laser tube assembly. Getting the flow direction right matters a lot for how well everything cools down during operation. When sealing up those connections, most folks find either silicone sealant or good quality Teflon tape works best to stop any unwanted leaks from happening. A tight connection not only saves water but also keeps the whole system running smoothly over time. And let's face it, nobody wants their expensive laser tubes wearing out prematurely because of poor connections.
2. Electrical Connections and Grounding Procedures
When connecting power to a chiller unit, following safety rules is absolutely essential to avoid dangerous situations. Start by checking the wiring diagrams provided in the equipment manual from the factory. Make sure all the right tools are at hand before beginning work – basic stuff like flathead and philips screwdrivers, some good quality wire cutters/strippers, plus plenty of electrical tape for insulation. The grounding aspect cannot be ignored either. Proper grounding creates a safe route for any stray current to escape into earth rather than flowing through walls or metal parts where it could cause shocks or fry components. A well grounded installation does more than just meet code requirements; it actually works better long term while keeping everyone around it protected from potential accidents.
3. Initial System Test for Leaks and Flow
After putting together the chiller system, running some basic tests makes good sense before turning it on for real. First things first, check around all those connection points for any signs of leakage since that usually means something wasn't sealed right during installation. Inside the laser tube itself, watch out for regular bubbling patterns or steady water movement through the glass - these are pretty clear signs that water is actually flowing properly throughout the system. While doing this, also take a quick look at all the electrical wiring to make sure nothing looks loose or damaged, then flip the power switch to see if everything lights up as expected. Taking time to go through these steps upfront can save headaches down the road when trying to troubleshoot why the cooling isn't working right later on.
Configuring Temperature Regulation Settings
1. Setting Optimal Cooling Temperature Ranges
Getting good results out of a laser cutter really depends on figuring out the right cooling temps for the specific machine. Most folks find that keeping things around 18-23°C works pretty well for those CO2 engravers they're running. This helps avoid the whole overheating problem while making sure the machine runs efficiently enough. Finding that sweet spot means protecting the laser tube without sacrificing too much cutting accuracy though. And don't forget about adjusting when conditions change either. If the workshop gets too hot or humid, those standard settings just won't cut it anymore. Real world experience shows that small tweaks can make all the difference in getting consistent cuts day after day.
2. Calibrating Water Flow Rate for Efficiency
Getting the water flow rates right matters a lot for making sure the chiller can keep up with what the laser cutter needs for cooling. The basic idea is to get rid of all that heat properly so the machine stays running at its best. If the flow isn't just right, temperatures start bouncing around too much and that messes with the quality of cuts being made. Most shops find they need to check these settings pretty regularly because things change throughout the day. Environmental factors like room temperature shifts or when the equipment gets worn down over time can throw everything off balance if we aren't watching closely enough.
3. Monitoring Systems for Real-Time Adjustments
Technology tools for real time monitoring really help improve how we control temperatures effectively. These monitoring systems keep an eye on things like water temps, flow rates, and what's going on around them in the environment. All this information tells us when something needs changing so everything stays within the right operating range. The smart way to do this is by getting these systems involved in analyzing data as it comes in, then making quick changes based on what they see. This approach keeps laser systems running smoothly without any hiccups, ensuring precision throughout their operation cycle after cycle.
Post-Installation Maintenance and Troubleshooting
Daily/Weekly Maintenance Checklist
Once the laser chiller gets installed, setting up a good maintenance schedule makes all the difference for keeping it running smoothly. For day to day stuff, someone needs to look at fluid levels regularly and make sure nothing dusty or dirty builds up around the system since this kind of mess really slows things down. On a weekly basis, operators should check those hoses for cracks or leaks, double check if all the electrical connections still feel tight, and give those silicone tubes a good look out for clogs that could mess with water flow. Keeping records of when these checks happen isn't just paperwork either. These notes become super useful later on when trying to figure out what went wrong or why something stopped working properly after months of operation.
Identifying Common Chiller Performance Issues
Spotting problems with a chiller before they get serious saves money on fixes and keeps production running smoothly. When chillers start acting up, watch out for strange noises coming from the unit or unexpected changes in temperature readings. These could point to issues either inside the chiller itself or somewhere in the laser's cooling system. Regular checks make all the difference. Take time to test how well the laser stays cool during operation and give it a good listen for any odd rattles or hums that don't belong. Keeping an updated troubleshooting manual handy in maintenance files is another smart move. Most shops find these guides invaluable when dealing with recurring issues, helping technicians resolve problems faster and extend the life of their engraving laser machines' chillers significantly.
Troubleshooting Overheating or Flow Errors
When dealing with overheating problems or flow issues in laser chillers, taking a step-by-step approach works best. First things first: if the system starts getting too hot, checking coolant levels becomes absolutely necessary. Most systems need at least 80% fill level to work properly. For flow problems, technicians should look closely at those silicone tubes running through the unit. Sometimes debris builds up inside them, causing restrictions. The pump itself needs testing too - just because it runs doesn't mean it's pushing water effectively. Letting these problems go unchecked can really hurt equipment lifespan. We've seen cases where ignored overheating damaged expensive laser components within weeks. That's why catching early warning signs matters so much for keeping operations running smoothly without unexpected downtime. A good maintenance schedule that includes weekly temperature checks and monthly flow tests goes a long way toward preventing bigger headaches down the road.